Introduction:
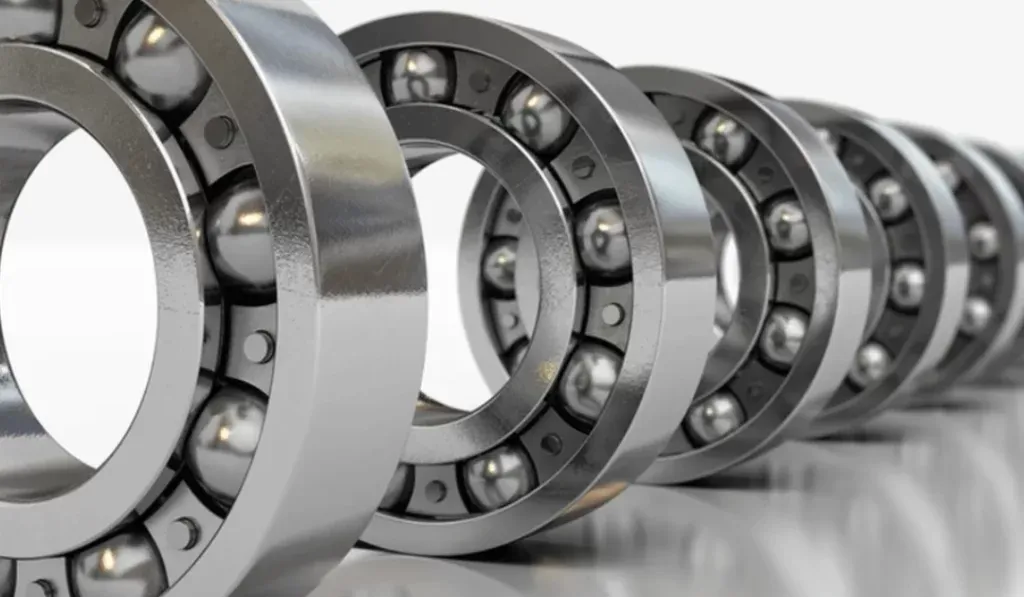
Bearings play a crucial role in various machines and equipment, allowing for smooth and efficient rotation. Over time, bearings can accumulate dirt, debris, and lubricant residue, leading to decreased performance and potentially causing damage if left unattended. To ensure optimal functionality and longevity, regular cleaning and maintenance are essential. In this blog post, we will provide a comprehensive guide on how to clean bearings effectively and safely. By following these steps, you can extend the lifespan of your bearings and maintain their peak performance.
Gather the Necessary Tools and Materials:
Before you begin cleaning your bearings, it’s crucial to have the right tools and materials at hand. Here’s a list of what you’ll need:
- Safety goggles and gloves
- Cleaning solvent (such as isopropyl alcohol or specialized bearing cleaner)
- Small brush (toothbrush or soft-bristle brush)
- Compressed air or an air blower
- Clean lint-free cloth or paper towels
- Disposable container or tray
Preparation and Safety Measures:
- Cleaning bearings involves working with potentially hazardous solvents and small parts, so taking proper safety precautions is vital. Here are some essential steps to follow:
- Work in a well-ventilated area or wear a respirator if working in a confined space.
- Wear safety goggles and gloves to protect your eyes and skin from chemicals and debris.
- Ensure you have adequate lighting to inspect the bearings thoroughly.
- Disconnect or disassemble the bearing from the equipment as required.
Removing the Bearings:
- To clean bearings effectively, you will need to remove them from the equipment. Depending on the type of bearing and its location, this process may vary. Here are general steps to follow:
- Consult the equipment’s user manual or online resources for specific instructions on bearing removal.
- Use appropriate tools (e.g., wrenches or pullers) to carefully disassemble the bearing from its housing.
- Take note of the order and orientation of any bearing components for reassembly later.
Cleaning the Bearings:
- Once the bearings are removed, it’s time to clean them thoroughly. Follow these steps to ensure effective cleaning without causing damage:
- Begin by inspecting the bearings for any visible damage or wear. Replace any damaged or worn bearings to maintain optimal performance.
- Using a small brush, gently remove any loose dirt, debris, or old lubricant from the bearing surfaces. Be careful not to scratch or damage the bearing components.
- Place the bearings in a disposable container or tray and fill it with a suitable cleaning solvent, covering the bearings completely. Allow the bearings to soak in the solvent for the recommended time as per the solvent manufacturer’s instructions.
- After the recommended soaking time, use the brush to agitate the bearings gently. This will help dislodge any remaining dirt or residue.
- Rinse the bearings thoroughly with clean solvent or isopropyl alcohol to remove any loosened contaminants. Repeat this step if necessary until the solvent remains clean after rinsing.
- Use compressed air or an air blower to blow away excess solvent and ensure the bearings are completely dry. Alternatively, you can leave the bearings to air-dry on a clean lint-free cloth or paper towel.
Lubrication and Reassembly:
- Proper lubrication is crucial for the smooth operation of bearings. Once the bearings are clean and dry, follow these steps to lubricate and reassemble them correctly:
- Apply a thin, even layer of high-quality lubricant suitable for your bearing type. Consult the bearing manufacturer’s guidelines or the equipment manual for the recommended lubricant.
- Avoid over-lubrication, as it can lead to increased friction and overheating. A thin coating of lubricant is usually sufficient.
- Carefully reassemble the bearing components in the correct order and orientation, referring to any notes or markings made during the disassembly process.
- Ensure all fasteners are tightened to the specified torque values, taking care not to overtighten.
- Once the bearings are reassembled, conduct a visual inspection to confirm that everything is in place and aligned correctly.
Final Checks and Maintenance:
- After cleaning and reassembling the bearings, it’s essential to perform a final set of checks and ongoing maintenance to ensure optimal performance and longevity:
- Rotate the bearings by hand to ensure they move smoothly without any grinding or resistance.
- Reinstall the bearings into the equipment, following the manufacturer’s instructions for proper installation.
- Regularly monitor the bearings for any signs of wear, overheating, or unusual noise during operation. Address any issues promptly to prevent further damage.
- Establish a routine maintenance schedule for cleaning and lubricating the bearings. The frequency may vary depending on the application and operating conditions. Refer to the equipment manual or consult with a professional if unsure.
- Consider using protective seals or shields to prevent contamination and prolong bearing life.
Conclusion:
Cleaning bearings effectively and safely is crucial for maintaining their performance and extending their lifespan. By following the steps outlined in this guide, you can ensure that your bearings remain in optimal condition, providing smooth rotation and minimizing the risk of damage. Remember to prioritize safety by wearing protective gear and working in a well-ventilated area. Regular maintenance and proper lubrication will contribute to the longevity and reliable operation of your bearings. By incorporating these practices into your equipment maintenance routine, you can maximize the efficiency and durability of your bearings.


